In this article, learn how to connect MailChimp to Breadcrumbs in few steps and how to use it as a source when creating your scoring model.
- What this integration does
- What you'll need
- How to set up the integration
- How to use the integration
What this integration does
Adding MailChimp to Breadcrumbs makes it easy to analyze and score your email lists by matching your contact and company properties with events and activities your subscribers do on your website and/or via email.
- easily find and select the right contact and/or company property to add to your scoring model;
- automatically update the existing scoring field on MailChimp;
- get granular data at the category level AND get comprehensive insights on your list;
- score and sort your lists according to Breadcrumbs' unique co-dynamic scoring system and find the prospects to reach out to close more deals faster.
Additionally, when adding MailChimp to Breadcrumbs as a secondary source, you'll be able to further enrich the information in your primary source to create an even more powerful scoring model.
What you'll need
- A Breadcrumbs account
- A MailChimp account
How to set up the integration
Connect MailChimp from Users Settings > Connections
To connect MailChimp to Breadcrumbs, navigate to the main dashboard or your User Settings page > Connections and click "Add source." You'll be asked to select a platform you want to connect to. In this case, choose MailChimp.
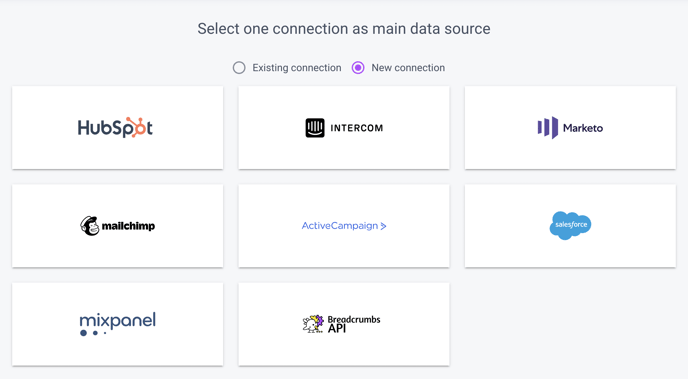
When you click Mailchimp, you'll be able to choose a connection from the ones you have permissions for. Then, click on it to connect the one you need.
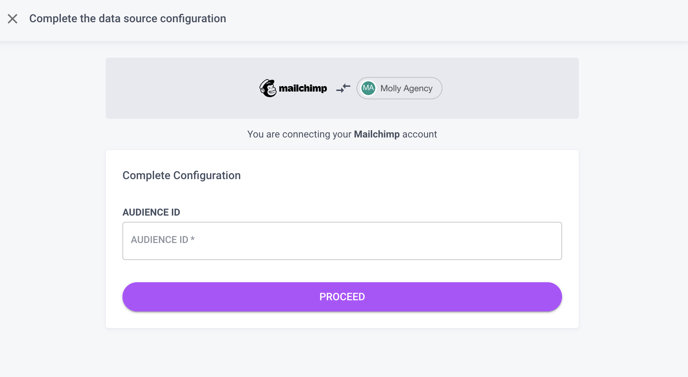
To complete the configuration, you'd need to insert MailChimp Audience ID.
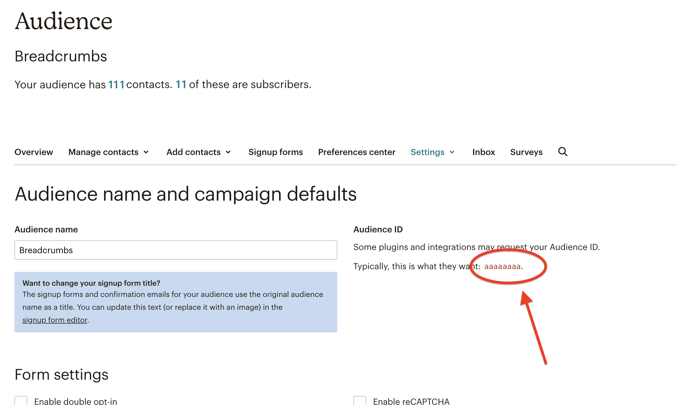
Navigate to your MailChimp account to retrieve the Audience ID; you'll find it under Audience > Settings > Audience names and defaults.
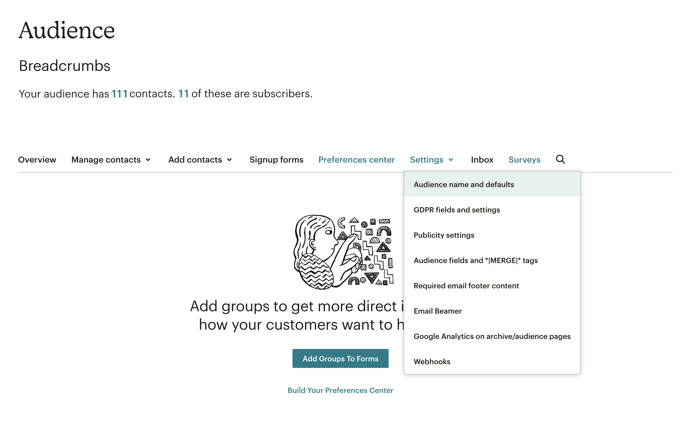
Once on that page, locate the Audience ID.
After selecting the MailChimp instance you wish to connect to and adding the MailChimp audience ID, you can choose your scoring and objective lists.
Once you click on Complete Configuration, you're all set. You can check all your connections from the User Settings page > Connections.
Note: in the context of MailChimp, lists are called Segments. Before connecting your MailChimp account to Breadcrumbs, please ensure you have at least one Segment in your MailChimp account. If you don't, we won't be able to finalize the connection.
Connect MailChimp from Workspace Settings
From the Workspace Settings page, click on "Add Source."
Follow the procedure outlined here to connect MailChimp to Breadcrumbs.
Note: When connecting a MailChimp instance from an existing scoring model, you can use it only as a secondary source for that scoring model. However, after the connection is first made, you can select MailChimp as the primary source of a different scoring model.
How to use this integration
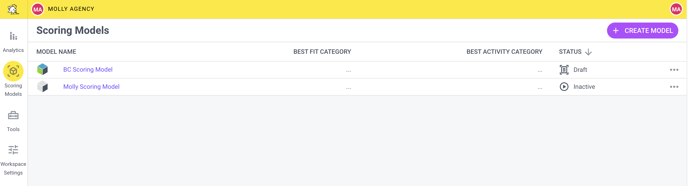
To create your scoring model, go to Scoring Models and click "Create Model."
Scoring model creation consists of 3 steps:
For detailed instructions on creating your scoring model, please read the complete guide to creating your first Scoring Model with Breadcrumbs.
1. Fit Model
Fit Categories are used to score your leads based on who they are. Use Firmographic or demographic data to identify your best leads.
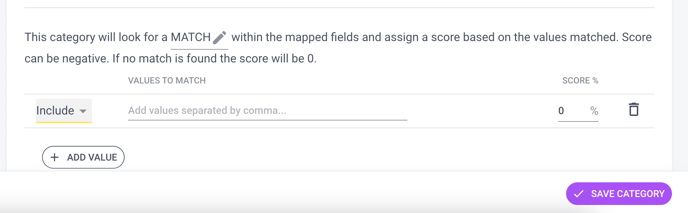
Please create a new Fit category by giving it a name and a weight. Then, click "Add Mapping" to use MailChimp and "Change field" to add company or contact properties in the fit model.
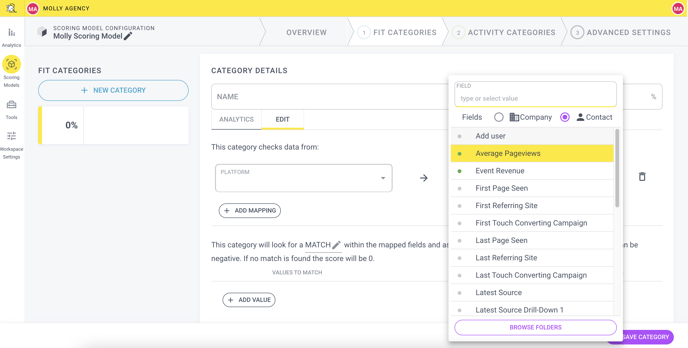
Once you select the field, you'll be able to include or exclude additional values to refine your model further.
2. Activity Model
Activity Categories are used to score your leads based on how they are interacting with you over time. An action taken today doesn't have the same value as an action taken one month ago.
Please create a new Activity category by giving it a name and a weight. Then, configure the absolute decay, the interval rate (days), and min and max frequency.
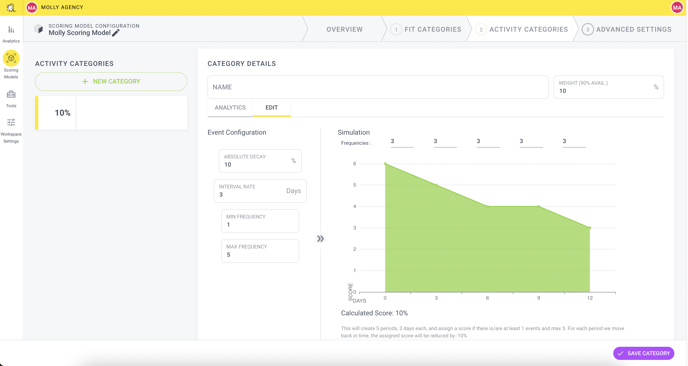
In the above example, the configuration will create five periods, three days each, and assign a score if there are at least one event and a max of 10. For each period we move back in time, the assigned score will be reduced by -10%.
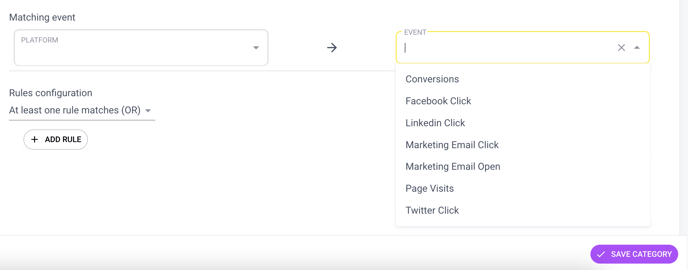
Now you need to add the matching event. Pick MailChimp in the Platform field and the event you need. Next, you can set up rules to further refine your data.
3. Advanced Settings
In this last step, we'll ask you to map your output fields so that we can add the information to your MailChimp account. Here, you can select and automatically update the existing scoring fields you already have in MailChimp.
Once you're done, click the preferred option to activate and run your model against your settings, save it as a draft, or test it against other scoring models.
Happy scoring!